Slide libraries can contain multi-slide or single-slide PowerPoint files. The Split tool is an admin-level feature that allows you to quickly break apart PowerPoint presentations into single-slide assets. Each slide is saved as a separate file and is immediately available in your asset library.
This article explains how the Split tool works in BrandIn and how administrators can use it to manage presentation content more efficiently.
How it works
When you use the Split tool, the presentation is divided into single-slide files.
A new folder containing the split slides is created in the same location as the original file, using the same name. The slides are instantly available in BrandIn.
ℹ️Multi-slide presentations are required for this feature. If a file contains only one slide, the Split tool will not run.
Split options
The Split tool includes several options that control how exported files are organized.
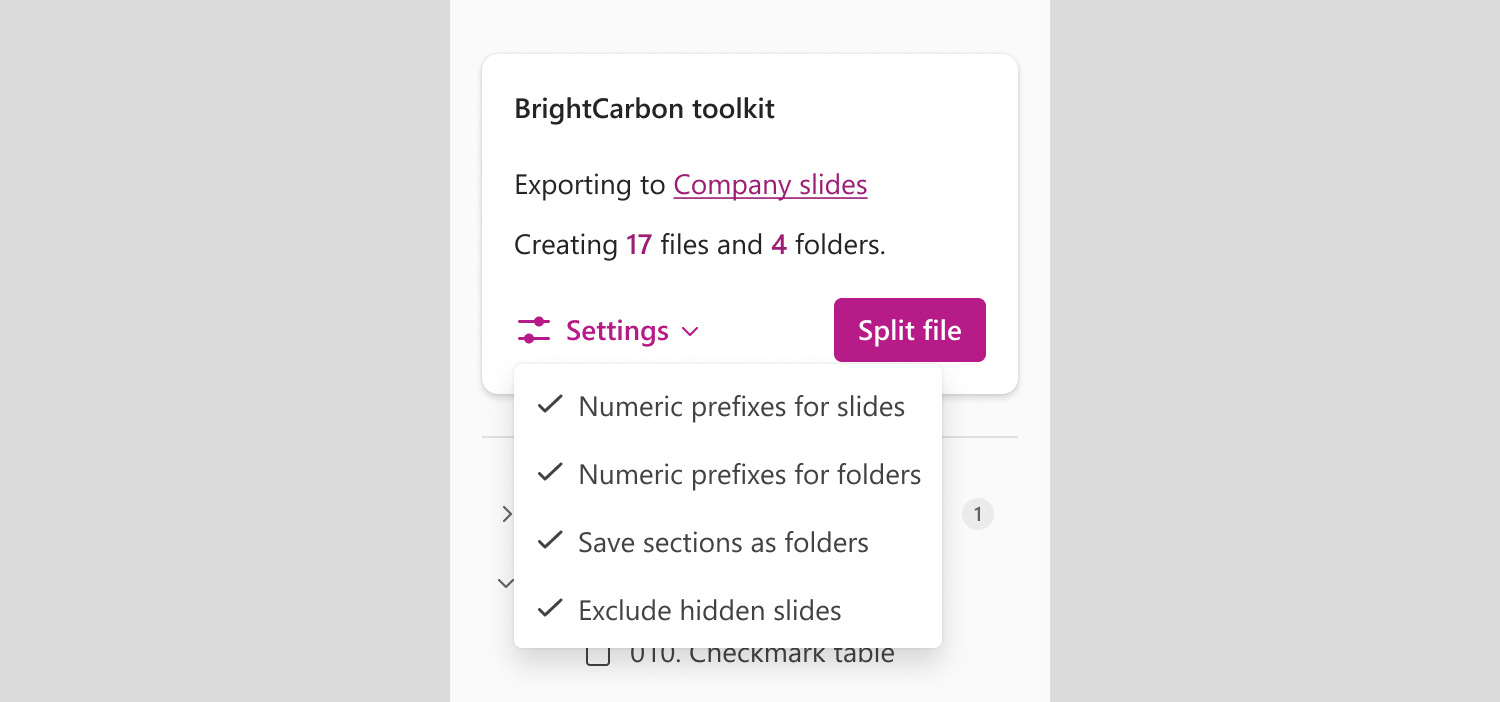
All options are enabled by default unless stated otherwise.
- Numeric prefixes for slides
Adds numbers to slide file names to keep the slides in their original presentation order. BrandIn hides the prefixes but keeps the order. - Numeric prefixes for sections
Adds numbers to section folder names to maintain their original order. Available only if the original presentation includes sections and the Save sections as folders option is enabled. BrandIn hides the prefixes but keeps the order. - Save sections as folders
Available only if the original presentation includes sections. When enabled, each section is saved as a folder containing its slides as individual files. - Exclude hidden slides
Available only if the presentation contains hidden slides. When enabled, hidden slides are excluded from the export.
ℹ️Hidden slides and section-based settings are only available if they exist in the source presentation.
How to split a file
To split a presentation into individual slides:
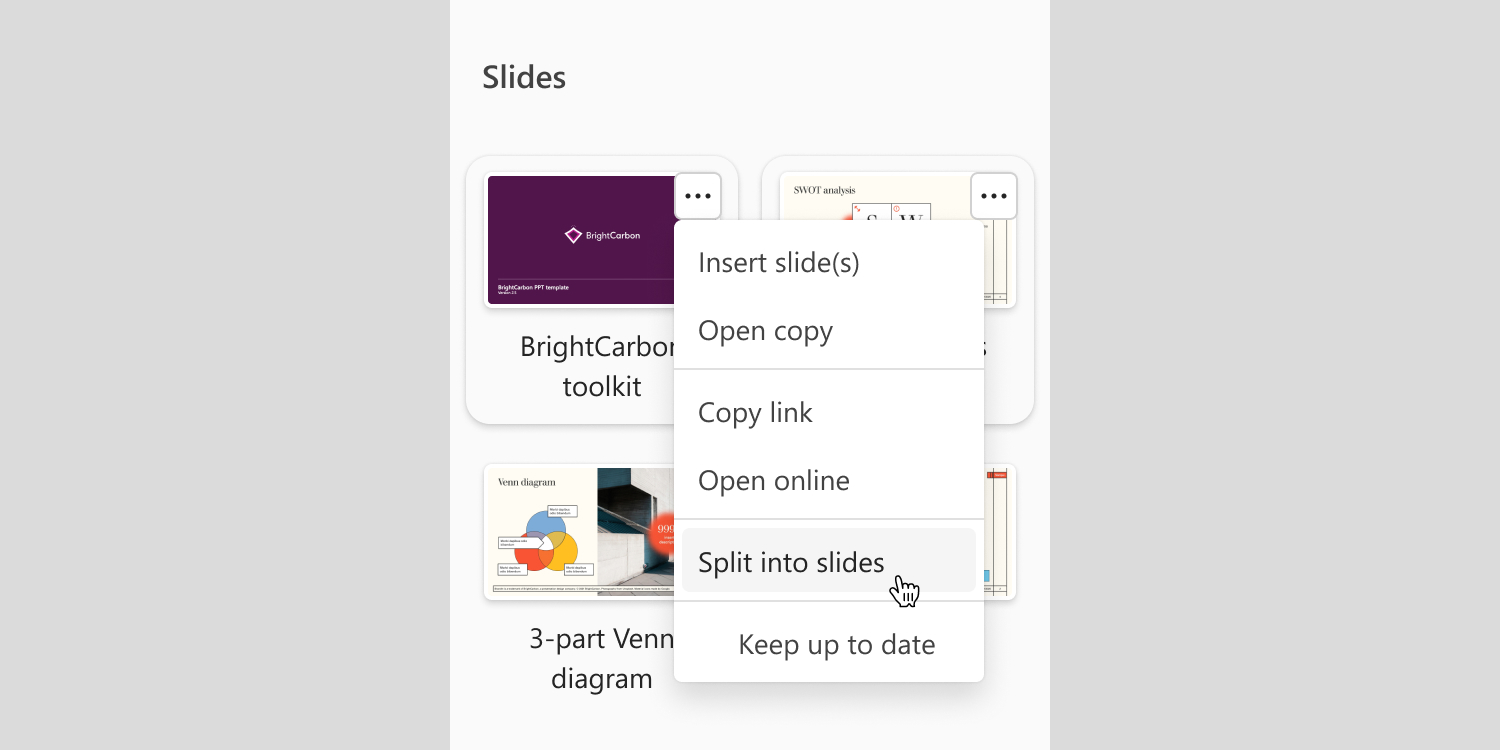
- In BrandIn, open the library that contains the presentation you want to split.
- Right-click the file or select the More options button (three dots).
- Select Split into slides from the menu.
The file opens as a copy in a new window, and the Split tool automatically appears in the task pane.
Once the Split tool opens:
- Adjust the options in the Settings menu as needed.
- Select Split file.
ℹ️The split process may take some time depending on the presentation’s size. A progress indicator will appear while the export is in progress.
After the split
When the process is complete:
- Close the split window and return to the window from which the process was started.
- A new folder containing the split slides appears in the same location as the original file.
- Each slide is saved as an individual file and is immediately accessible in your BrandIn library.
If you see a permissions error
If you see the “Unable to upload files” message, it means you don’t have permission to save split slides to the SharePoint or OneDrive location where the original file is stored.

To fix this:
- Check your SharePoint or OneDrive permissions. You need Edit permission to upload and save files. If you can open but not upload files, you likely have Read-only access.
- Contact your IT administrator. Ask to update your permissions to Edit level for the SharePoint site where the file is stored, or ask the owner of the OneDrive to give edit rights.
ℹ️You can share this these help article articles with your IT administrator for reference: Manage access on SharePoint or Manage access on OneDrive.