This article explains how to use Aprimo as a source for BrandIn asset libraries. Once configured, administrators can link the entire Aprimo DAM or specific collections directly to BrandIn.
Overview
To get started using Aprimo in BrandIn, the following steps are required:
- Create an OAuth application in Aprimo.
- Create an Aprimo connector in BrandIn.
- Add an Aprimo library to BrandIn.
Once set up, users can browse, search, and insert Aprimo assets directly from BrandIn.
1. Create an Aprimo OAuth application
Before connecting BrandIn, you must create an OAuth application in Aprimo.
ℹ️You must have Security or System Administration rights in Aprimo to complete this step. Learn more.
- Log in to Aprimo.
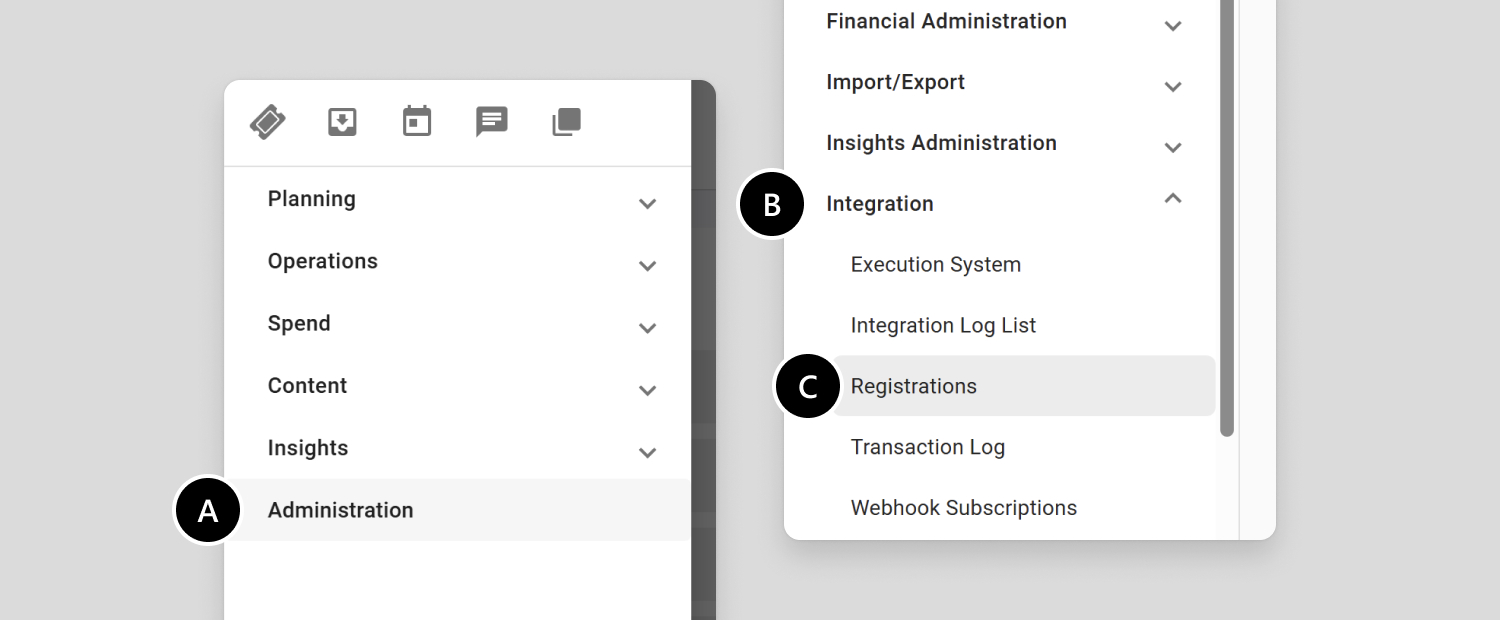
- Go to Administration → Integration → Registrations from the menu in the top-left.
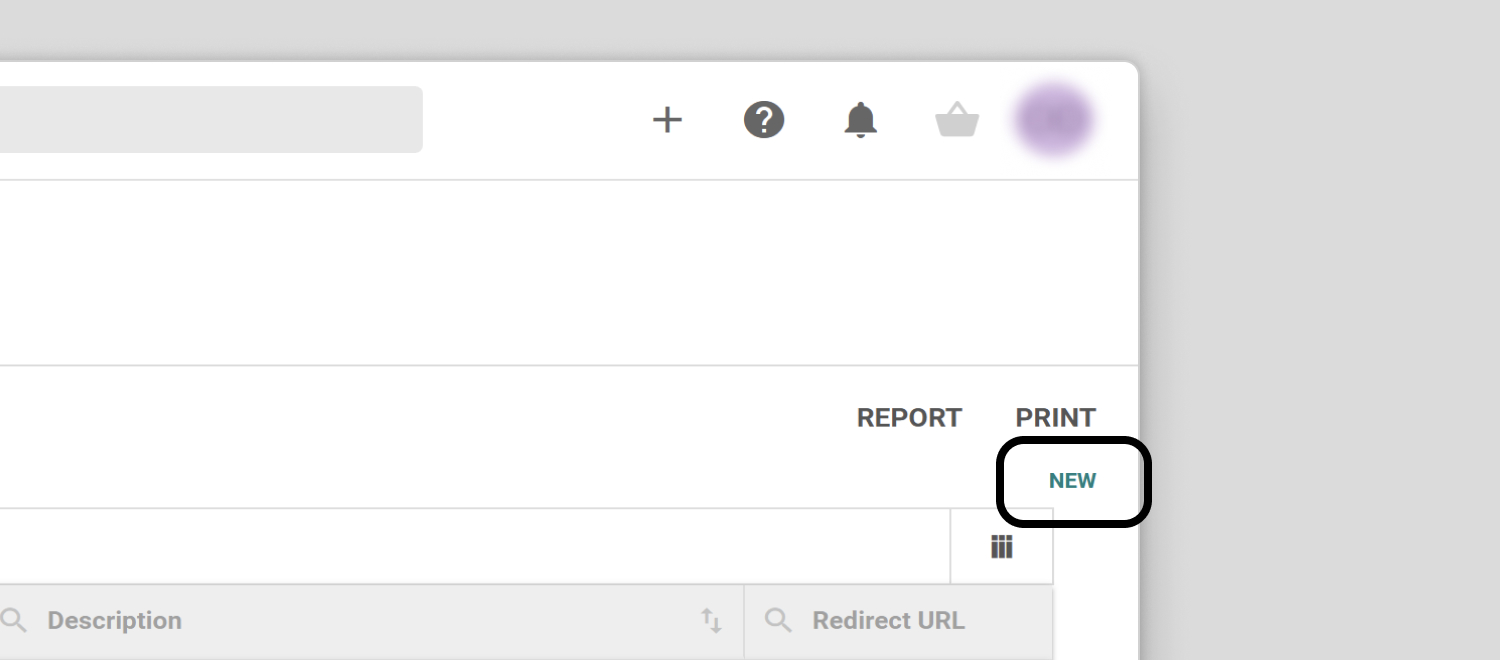
- Once on Registrations page, Click New in the top-right.
- Configure the application with the following settings:
- Client ID: No input required, ID will be generated automatically.
- Client: Give your application a useful name, such as BrandIn.
- Description: Give your integration a descriptive name, such as BrandIn integration.
- Client Secret: Create a client secret and keep it somewhere safe as you won't be able to view it after you complete this process.⚠️Keep the Client secret secure. Do not share it publicly or include it in screenshots or documentation.
- Redirect URL: Enter the URL provided below.ℹ️Redirect URL: https://app.brandin.space/api/dam/callback
- OAuth Flow Type: This controls how you want your users to authenticate with your Aprimo-hosted locations. Select one of the options and follow the configuration for each below.
Authorization Code with PKCE: Each user will have to log in using their Aprimo credentials. Use this if you want to enforce Aprimo's user-specific permissions in BrandIn.ℹ️Enable the Refresh Token field and set the Refresh Token Lifetime to your preferred duration. You can set it between 60 minutes and 10 days (14,400 minutes). A longer lifetime means users will need to re-enter their credentials less frequently.
Client credentials: Choose a single Aprimo user for authentication. No user needs to enter credentials, and each user sees the same content. It's recommended that you create a dedicated user for this integration type.ℹ️User: Select a user account. The selected user's permissions will be used.
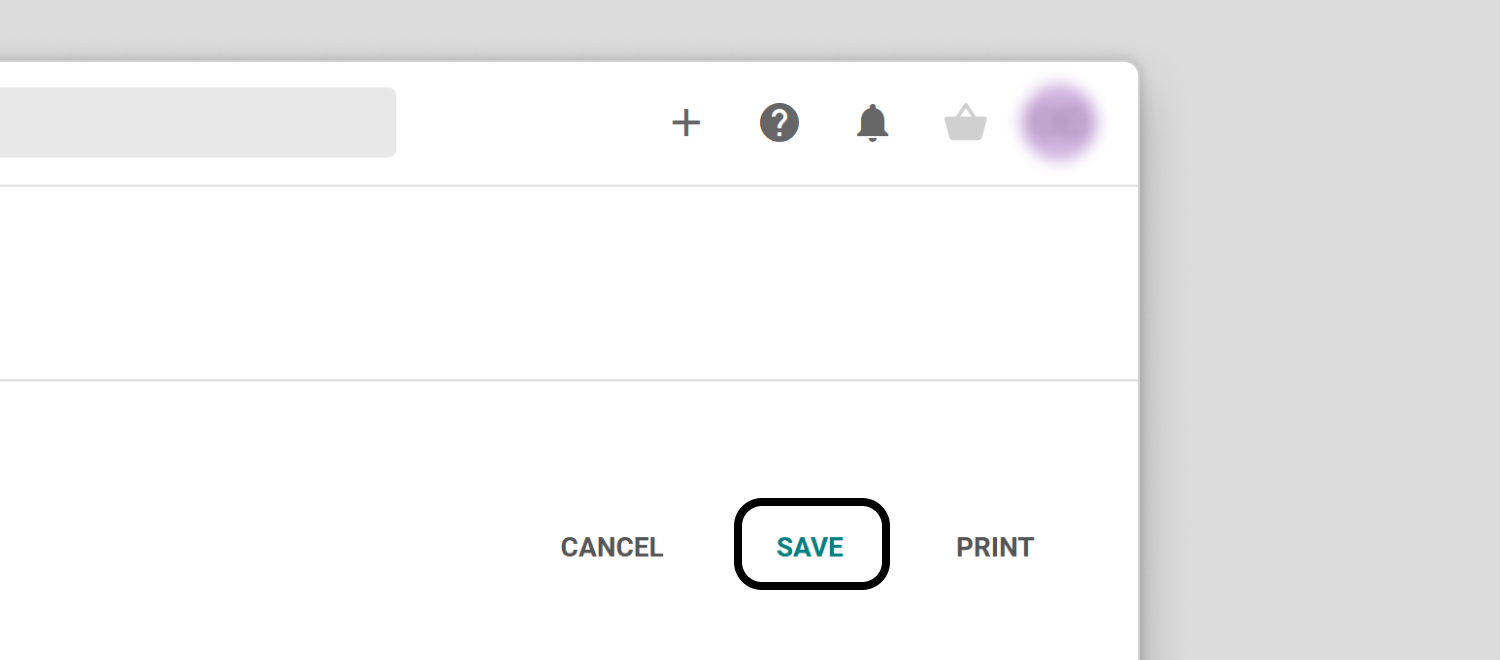
- Create the application by selecting Save in the top-right.
- Copy the Client ID from the Registrations list in Aprimo and keep the Client secret you saved earlier at hand. This will be required to set up the connector in BrandIn.
2. Create an Aprimo connector in BrandIn
ℹ️You must be a BrandIn administrator or an M365 administrator to complete this step.
Once the OAuth registration is created:
- Go to the BrandIn admin center and log in.
- Navigate to Integrations.
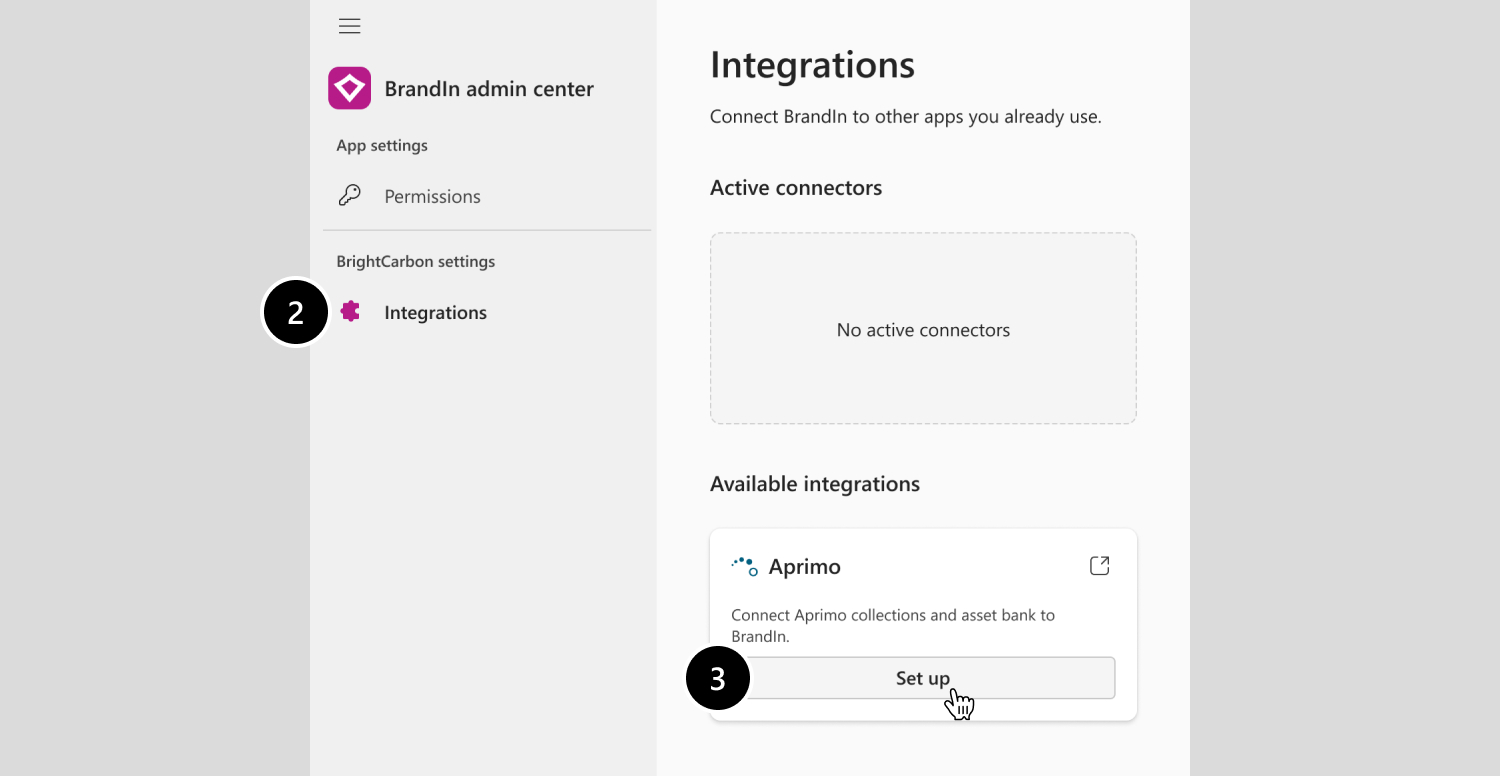
- In the available integrations section, select Set up Aprimo.
- Configure the connector:
- Name your connector.
- Insert your Aprimo domain (e.g. https://company.aprimo.com).
- Match the Authentication grant type to your OAuth app.
- Paste the Client ID from Aprimo OAuth app & Client secret you saved earlier.
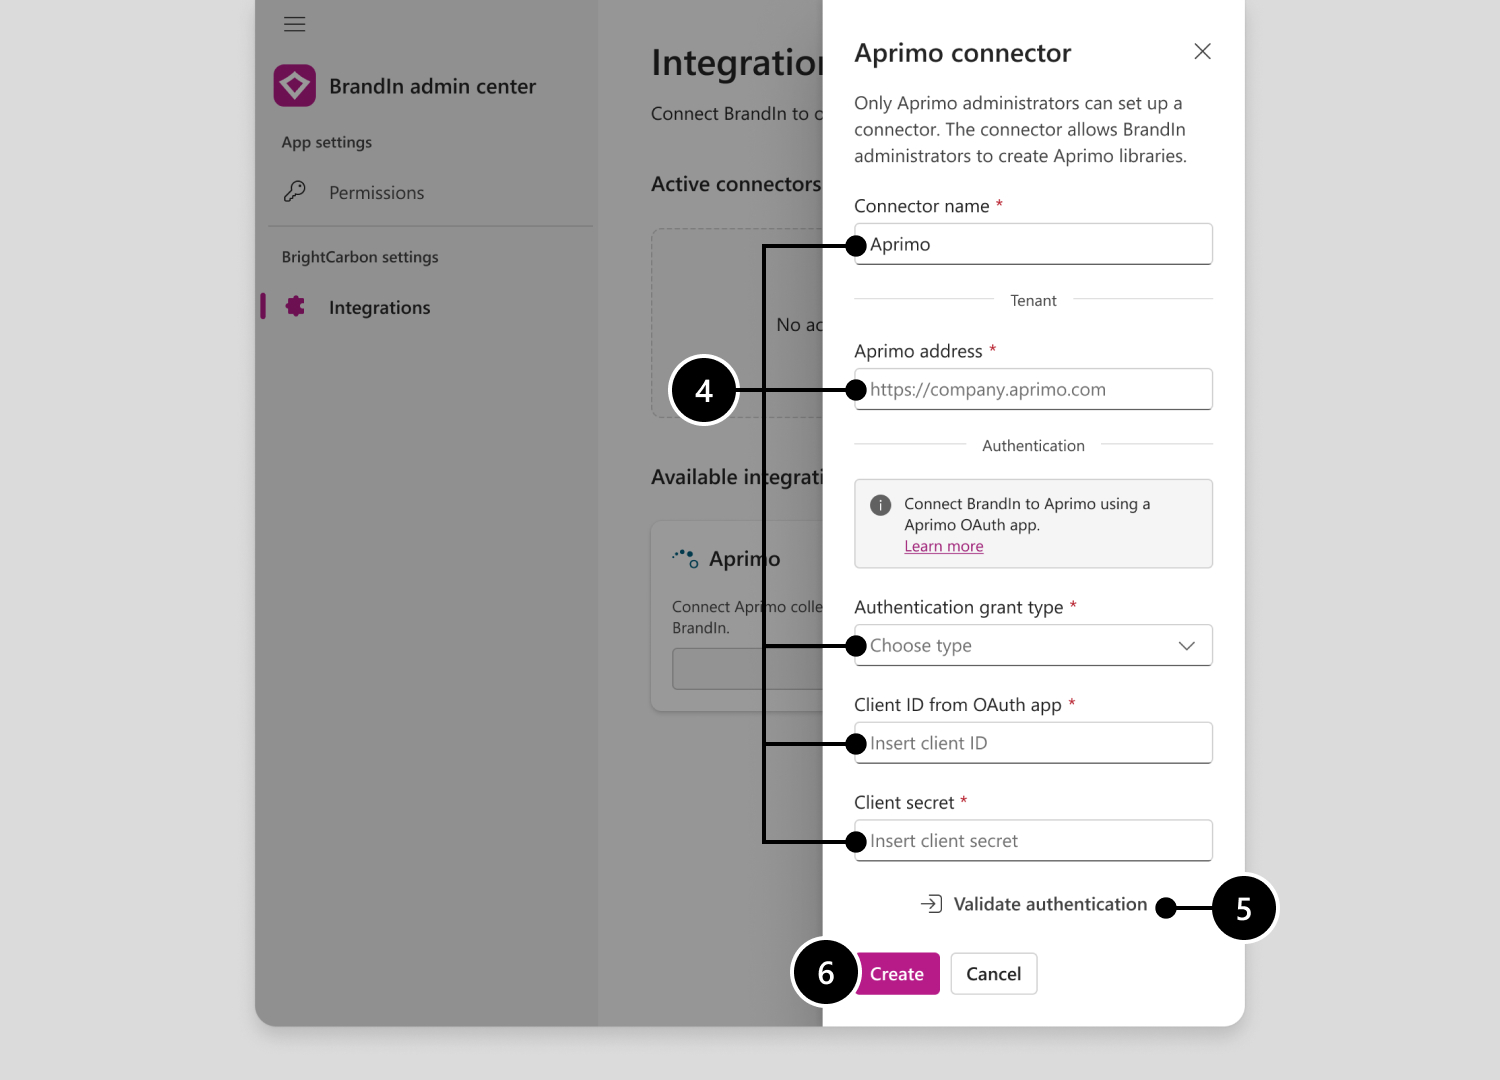
- Once configured, select Validate authentication to ensure that everything is configured correctly.
- Select Create to finish.
3. Add an Aprimo asset library
After the connector is configured, you can add Aprimo collection or entire DAM to BrandIn.
ℹ️You must be a BrandIn administrator to complete this step.
Start asset library setup in workspace settings.
- Go to the home screen of the workspace where you want to add the library.
- Select the Edit button next to the workspace name to open workspace settings.
- Go to Asset libraries.
- Select Add library. You'll then be guided through the following steps.
3.1. Choose where your assets are stored
You can link collections or the entire Aprimo DAM. Choose Aprimo as the source of the library.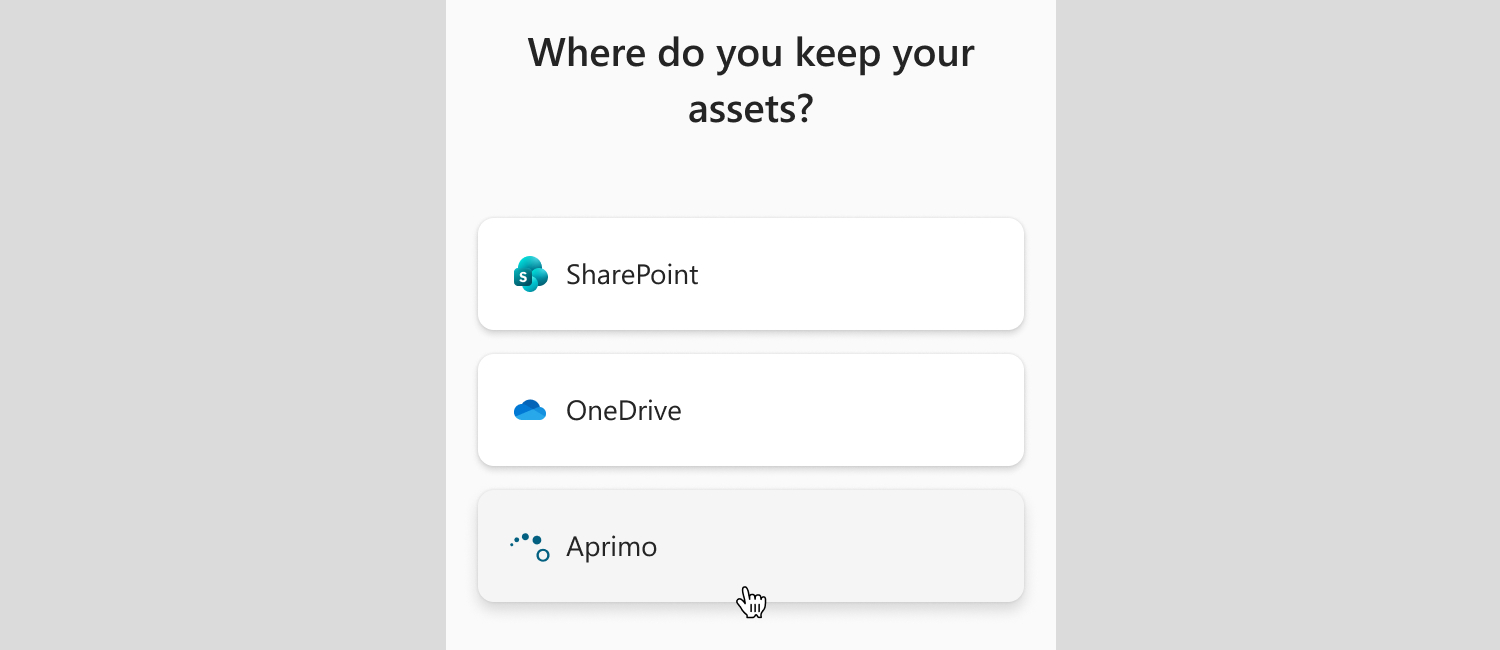
3.2. Link your assets location
- Open Aprimo and go to the Spaces (A), if you want to link the entire DAM, or any collection (B) you want to link as a library.
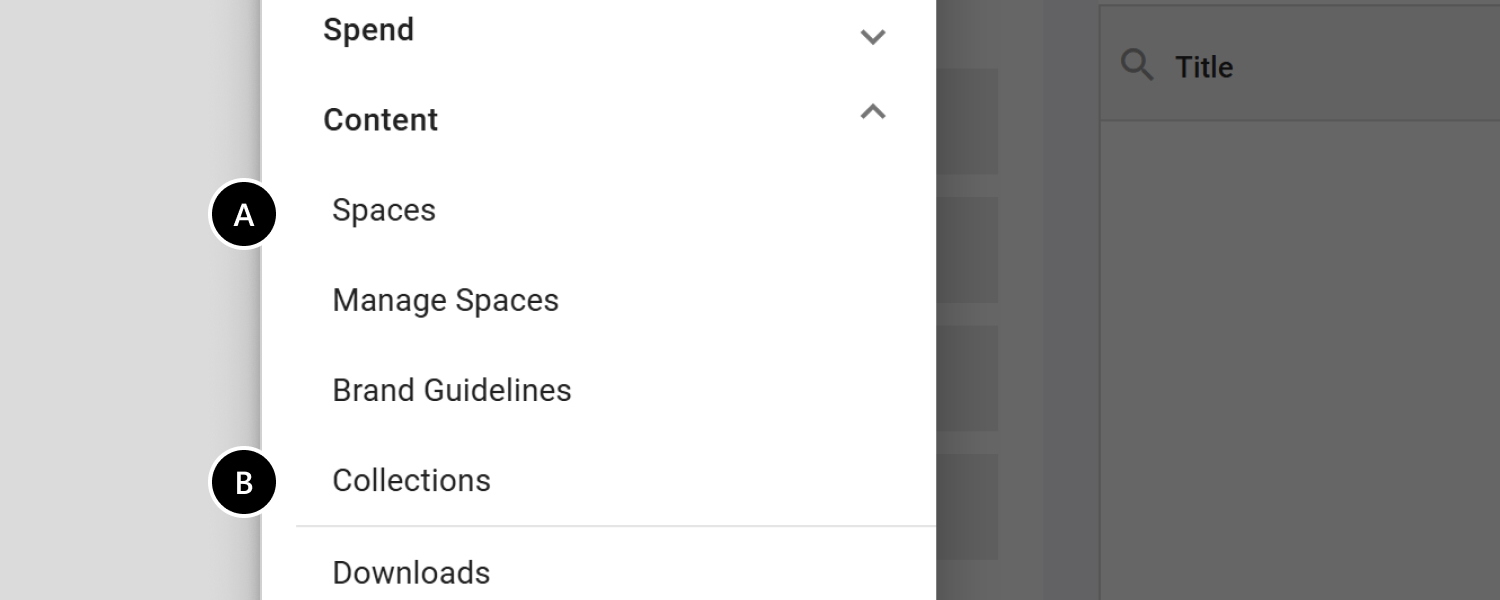
- Copy the location's link from the browser's address bar.ℹ️To link the entire Aprimo DAM, copy the link to the Spaces page from your browser's address bar. The link should follow this format: https://company.dam.aprimo.com/dam/
- Return to BrandIn and paste the link into the input box.
3.3. Give your library a name
The name is only visible in BrandIn. It won't change anything in Aprimo.
3.4. Choose a library type
Each library type is designed for specific types of assets, with different behaviors and default views. Some library types hide certain file formats. Learn more about library types.
3.5. Finish setup
Your library is added to the workspace home screen. Any changes to assets in the linked location also appear in BrandIn.
How Aprimo libraries work in BrandIn
- BrandIn reads assets and collections directly from Aprimo.
- Libraries behave like standard BrandIn asset libraries.
- Images get automatically optimized for PowerPoint use on insertion.
Tips
- Use collections to curate smaller, targeted asset sets.
- If assets don't appear, check Aprimo permissions, OAuth app, and scopes.
- If some assets fail to insert, check the user's File Type permissions in Aprimo. Users without File Type permissions can still preview assets in BrandIn, but they cannot download and insert the original files.
Was this article helpful?
That’s Great!
Thank you for your feedback
Sorry! We couldn't be helpful
Thank you for your feedback
Feedback sent
We appreciate your effort and will try to fix the article